Windows, Windows Server are either registered trademarks or trademarks of Microsoft Corporation in the U.S. and/or other countries.
Other product and company names herein may be the trademarks of their respective owners.
Before You Begin
System Requirements for the Remote Operation Viewer
Installation Procedure
Starting the Remote Operation Viewer
Removing the Remote Operation Viewer
The Remote Operation Viewer enables you to access settings or process jobs from a personal computer by displaying the same screen as the control panel of your Canon multifunction peripheral (imageRUNNER, imagePRESS, or imageRUNNER ADVANCE series, hereafter referred to as "the machine") on the computer screen.
This document contains the latest information about the Remote Operation Viewer, and cautionary statements regarding its use. Make sure to read this document before using the software.
The Remote Operation Viewer has been verified to operate in the following system environments.
| OS | Windows Server 2008 (32bit or 64bit) Windows Server 2012 (64bit) Windows Server 2016 (64bit) Windows 7 (32bit or 64bit) Windows 8 (32bit or 64bit) Windows 8.1 (32bit or 64bit) Windows 10 (32bit or 64bit) |
| Computer | A computer in which one of the above operating systems can operate. |
| Software* | .NET Framework 2.X or .NET Framework 3.X |
| Hard Disk | More than 20 MB of free space. |
| Machine | A machine which supports the Remote Operation function. |
| * | You can download the .NET Framework from the Microsoft website. |
| The installation program starts. |
| The license agreement is displayed. |
| The installation confirmation screen is displayed. |
| Installation starts. |
This completes the procedure for installing the Remote Operation Viewer.
 |
If .NET Framework is not installed on your computer, an error message appears, and then the installation program terminates. Install .NET Framework, and then restart the installation program. The message may differ depending on the system environment you are using. |
Follow the procedure below to start the Remote Operation Viewer.
The procedure below uses Windows 7 as an example. The button names and procedures may differ slightly, according to the operating system of your computer.
| |
Before starting the Remote Operation Viewer, make sure the Remote Operation settings of the machine are activated. |
| If [Canon Remote Operation Viewer 2.3] is not displayed, click [All Programs] → select the [Canon Remote Operation Viewer 2.3] folder. |
| You can also select the IP address (IPv4/IPv6) or domain name of a machine you have previously set using the drop-down list. |

| |
Make sure to confirm the IP address (IPv4/IPv6) or domain name of the machine. If you do not know the IP address (IPv4/IPv6) or domain name of the machine, contact your system administrator. |
| |
It may take time to confirm the connection with the machine, depending on your system environment. |
| |
If connecting to the machine fails, a message prompting your confirmation is displayed. Confirm that the correct IP address (IPv4/IPv6) or a domain name that can be resolved has been entered. Click [Yes] to resume connecting to the machine. |
| |
You may not be able to connect to the IPv6 IP address, depending on the model of machine you are using. In this case, connect using the IPv4 IP address. |
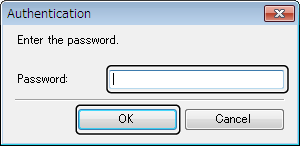
| If you have not set a password in the Remote Operation settings of the machine (from the Settings/Registration screen), this step is not necessary. |
Follow the procedure below to remove the Remote Operation Viewer from a computer in which it is installed.
The procedure below uses Windows 7 as an example. The button names and procedures may differ slightly, according to the operating system of your computer.
This completes the procedure for removing the software.
| |
You can also double-click the msi file for the language you selected during installation and select [Delete Canon Remote Operation Viewer 2.3] to uninstall the software. |