Zen Lightbox v1.6.4 ZC 1.5 Documentation
Introduction
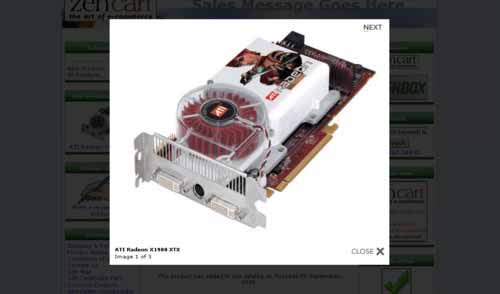
This contribution adds lightbox support to Zen Cart. All large product images will be displayed within a lightbox. This eliminates the need for popup windows and makes your website much more user friendly. Additional product images are displayed within a simple gallery interface.
As of v1.5, support for the lightbox effect on any page (including EZ-Pages) and keyboard navigation have been added. In addition to this, the source code has been optimised and the size of the JavaScript code has been reduced by 52.23%.
Credit is due to Christophe Beyls for creating Lightbox JS v2, Chris Boylan for his work on the Image Handler 2 support and the Zen Cart Team for creating the best open source ecommerce package available!
What's New
Version 1.6.4_1.5 - Release Date: 2012-04-28
- Updated javascript & css to better handle the "Always show Prev / Next" Setting
- Revised the EZ-Page to bring back the auto lightbox feature
Installation
This version of Zen Lightbox has been updated and tested for use with Zen Cart 1.5
Please remember to backup your website files and database before you continue.
To install Zen Lightbox follow the steps below.
- Download the latest version of Zen Lightbox from:
http://www.zen-cart.com/index.php?main_page=product_contrib_info&products_id=273
- Extract the contents (of zen_lightbox-v1.6.4_1.5-20120428.zip) to a temporary location, keeping the file structure intact. (Note: If you can't open this file try using 7-Zip, it's free!)
- Open the 1_Installer_Files folder
- Rename the following folders to match your template folder name.
includes\languages\english\extra_definitions\YOUR-TEMPLATE-FOLDER
includes\modules\YOUR-TEMPLATE-FOLDER
includes\templates\YOUR-TEMPLATE-FOLDER
- Rename the following folder to match your admin folder YOUR-ADMIN
- Upload the entire contents of the 1_Installer_Files folder, includes folder and the images folder to your server, again keeping the file structure intact. (Note: All files make use of the overrides system.)
- Open the 2_SQL folder and then open the install.sql file in a text editor (not microsoft word) and copy all of the text. Next go to (Admin > Tools > Install SQL Patches) in your Zen Cart admin and paste the contents of install.sql into the text area and then press the send button.
- Alternative to step 6. Open phpMyAdmin for your site and navigate to your database. Choose 'Import' and then 'choose file' and navigate to and select install.sql then choose 'Go'.
Zen Lightbox is now installed and ready to use!
You can configure various settings from the Zen Cart admin (Admin > Configuration > Zen Lightbox).
EZ-Pages
By default the lightbox effect will be applied to all links that point to images on your EZ-Pages. This functionality can easily be modified via the admin.
The gallery mode will automatically be used when more than one link to an image (on an EZ-Page) are located within the same parent element.
The only manual bit of coding required is the addition of captions (if you need them). You can add captions by including the rel="" attribute in your href tag. An example of this can be found below.
Any page
The above EZ-Pages functionality can be added to any page of your website.
To enable this, simple copy the jscript_zen_lightbox.php file (found at the root of the distribution) to the relevant modules/pages folder.
For example, if you wanted to apply this functionality to the contact_us page you would copy the above file to: includes/modules/pages/contact_us
Upgrade (fresh installation is recommended)
Upgrading from Zen Lightbox 1.6.3
File updates:
- Remove [images/zen_lightbox]
- [includes/classes/zen_lightbox/autoload_default.php]
- [includes/modules/pages/page/jscript_zen_lightbox.php]
- [includes/templates/YOUR_TEMPLATE_FOLDER/css/stylesheet_zen_lightbox.css
Upgrading from Zen Lightbox 1.6.2
NOTE: You will need to run upgrade.sql in your phpMyAdmin OR zen cart admin.
File updates:
- [your-admin]/includes/languages/english/extra_definitions/zen_lightbox.php
Upgrading from Zen Lightbox 1.6.1
NOTE: You will need to run upgrade.sql in your phpMyAdmin OR zen cart admin.
File updates:
- includes/classes/zen_lightbox/slimbox.php
- includes/classes/zen_lightbox/autoload_default.php
- images/zen_lightbox (the whole folder)
Upgrading from Zen Lightbox 1.6
NOTE: You will need to run upgrade.sql in your phpMyAdmin OR zen cart admin.
File updates:
- includes/classes/zen_lightbox/slimbox.php
- includes/classes/zen_lightbox/autoload_default.php
- includes/languages/english/extra_definitions/[YOUR-TEMPLATE-FOLDER]/zen_lightbox.php
- images/zen_lightbox(the whole folder)
If you are upgrading from Zen Lightbox 1.5 or Lower see below
Upgrading from Zen Lightbox 1.5
The code, file structure and file names have changed a lot compared to previous versions. I would recommend the following steps if you are planning to upgrade.
If upgrading from v1.5 please ensure that you run the upgrade.sql script (via Admin > Tools > Install SQL Patches) before you proceed.
- Completely remove your old installation of Zen Lightbox. (Note: Open the old ZIP file (e.g. zen_lightbox_v1-5.zip) and remove any files listed that exist on your live website. Previous releases of Zen Lightbox are available to download from the same page as the current release - just scroll down a bit.)
- Upgrade to Zen Cart 1.3.9h. (If required.)
- Remove or replace any old Flash by-pass code from your template files. (If required.)
By default, all Flash objects will now be hidden when the lightbox is displayed. DIV tags similar to these should be removed. However, keeping these divs in place will do no harm.
<div class="flash">YOUR-FLASH-HERE</div>
<div class="zenLightboxHideMe">YOUR-ELEMENTS-HERE</div>
- Follow the Installation instructions above.
Version History
Version 1.6.4_1.5 - Release Date: 2012-04-28/p>
- Removed [images/zen_lightbox]
- modified [includes/classes/zen_lightbox/autoload_default.php]
- handles the "Always show Prev / Next" Setting better
- modified [includes/modules/pages/page/jscript_zen_lightbox.php]
- brings back missing EZ-Page auto lightbox feature
- modified [includes/templates/YOUR_TEMPLATE_FOLDER/css/stylesheet_zen_lightbox.css
- added 2 classes to hande new "Always show Prev / Next" code
Version 1.6.3_1.5a - Release Date: 2012-03-11
- Updated the following files to remove leftover 1.3.8 and 1.3.9 code and to make sure 1.5 code is all merged in:
- includes/modules/YOUR_TEMPLATE_FOLDER/additional_images.php
- includes/templates/YOUR_TEMPLATE_FOLDER/templates/tpl_modules_main_product_image.php
Version 1.6.3 - Release Date: 2011-12-31
- Zen Cart 1.5.0 compatibilty (needs a few more tweaks for backwards compatibility with 1.3.9)
- Added language to admin files
- updated the install.sql file for new DB entries that 1.5 needs
Version 1.6.2 - Release Date: 2011-01-23
- Added Always show Previous and Next buttons (when using additional images)
- Brought back close on image click feature
Version1.6.1 - Release Date: 2011-01-15
- Replace a missing extra definitions file
- Updated slimbox.php to read the overlay close parameter
Version 1.5 - Release Date: 2008-12-18
- Added Caption Animation Duration admin switch
- Added Close Lightbox admin switch
- Added Close on Image Click admin switch
- Added Display Image Counter admin switch
- Added Enable Keyboard Navigation admin switch
- Added full support for multilingual stores
- Added greater flexibility for Overlay Fade Duration admin switch
- Added Image Fade Duration admin switch
- Added Include Main Image in Gallery admin switch
- Added Initial Height admin switch
- Added Initial Width admin switch
- Added missing </b> to install.sql file
- Added Next Image admin switch
- Added Previous Image admin switch
- Added Resize Transition admin switch
- Added support for lightbox effect on any page (including EZ-Pages)
- Added title attributes (similar to alt text) to lightbox buttons
- Added uninstall.sql file
- Removed Border Size admin switch (this is now controlled by CSS)
- Removed DIV Class to Hide admin switch
- Removed Enable Resize Animations admin switch
- Removed header_php.php core file change
- Removed Hide Flash Objects admin switch (Slimbox handles this automatically)
- Updated blank entries in install.sql file to NULL
- Updated invalid characters in rel attributes of links (output code is now valid XHTML)
- Updated JavaScript code to classes to avoid source code duplication
- Updated lightbox code to Slimbox v1.67
- Updated modules to prevent JavaScript code from loading when Zen Lightbox is disabled
- Updated support for Zen Cart 1.3.8a and Image Handler 2.0_for_137
- Updated various configuration titles and descriptions within the admin
Version 1.4 - Release Date: 2007-09-23
- Renamed Zen Lightbox function, various files and folders
- Improved use of the overrides system for JavaScript and image files
- Added admin switch to enable/disable Zen Lightbox
- Added admin switch to adjust the overlay opacity
- Added admin switch to adjust the overlay fade duration
- Added admin switch to enable/disable resize animations
- Added admin switch to adjust the resize speed
- Added admin switch to adjust the border size
- Added admin switch to enable/disable the lightbox from closing when you click on the overlay
- Added admin switch to enable/disable Flash objects from being hidden when the lightbox is displayed
- Added admin switch to specify a DIV class to hide when the lightbox is displayed
- Added lightbox functionality to document_general_info, document_product_info, product_free_shipping_info, product_music_info, product_reviews, products_reviews_info and product_reviews_write pages.
- Updated Lightbox JS v2 code to version 2.03.3
- Reverted to original CSS code (with custom fixes)
- Fixed model number display error on product_reviews page
- Added code to load all lightbox resources before image loading is complete
- Updated support for Zen Cart 1.3.7.1 and Image Handler 2.0 v0916
- Removed close link from lightbox image
Version 1.3 - Release Date: 2006-10-20
- Added support for Image Handler 2
- Fixed apostrophes error in image display code
- Updated CSS file (compressed by 15.8%) using CSS Tidy at Clean CSS
- Updated source formatting of various files
Version 1.2 - Release Date: 2006-09-07
- Removed redundant images files (prev.gif and next.gif)
- Fixed width of previous and next links
- Added close link to lightbox image
- Added Flash by-pass code to avoid overlay issues
Version 1.1 - Release Date: 2006-09-06
- Added support for additional images
Version 1.0 - Release Date: 2006-09-05
- Initial release
FAQs
Below is a list of frequently asked questions.
How do I setup additional images for my products?
While this question isn't directly related to Zen Lightbox, I find that a lot of people have trouble setting up additional images and, therefore, are unable to experience the gallery feature of Zen Lightbox. Please read the tutorial at the link below to understand how additional images work.
http://tutorials.zen-cart.com/index.php?article=58
How do I change the colour of the overlay?
Open includes/templates/YOUR-TEMPLATE-FOLDER/css/stylesheet_lightbox.css and find the following code, which should be at the bottom.
Now, change the background-color value to the colour of your choice.
Support
You will find the official support thread at the link below. Please feel free to post any comments or questions there.