Installing by Specifying an inf File
This explains the procedure for installing a driver by specifying an inf file with the Windows add printer function.
You can also install by selecting a temporary port (such as [LPT1]) in this procedure.
Precondition
Confirm that the following conditions are satisfied. Complete the preparation operations.
When starting the computer, logon as a member of Administrators.
Confirm the IP address of the device (if adding a port).
Prepare the inf file.
Acquire the driver from the Canon web site (http://www.canon.com/) or the supplied CD-ROM, and prepare the inf file stored in the following location.
When downloading from the web site
32-bit version: Driver
64-bit version: x64\Driver
The above paths may differ depending on the driver.
When using the supplied CD-ROM:
FAX\us_eng\32BIT\Driver
Procedures
1.
Select [Devices and Printers] from the [

] (Start) menu.
For Windows 10:
Select [Settings] > [Devices] > [Printers & scanners].
For Windows 8/8.1/Server 2012/Server 2012 R2:
Display the charm bar to the right of the screen in [Desktop] → click [

Settings] > [Control Panel] > [Devices and Printers].
For Windows Vista/Server 2008:
Select [
] (Start) > [Control Panel] > [Printers].
For Windows Server 2003/Server 2003 R2:
Select [Start] > [Control Panel] > [Printers and Faxes].
2.
Click [Add a printer] or [Install a printer] → proceed according to the displayed add printer wizard.
For Windows 10:
Click [Add a printer or scanner] → after the search result is displayed, click [The printer that I want isn't listed] → proceed according to the displayed add printer wizard.
3.
Click [Add a local printer] (or [Add a local printer or network printer with manual settings]).
4.
Select [Create a new port] → select [Standard TCP/IP Port] from [Type of port] → click [Next].
When selecting a temporary port, select [Use an existing port] → temporary port ([LPT1] etc.) → proceed to step
7.5.
Enter the IP address of the device in [Hostname or IP address] → proceed according to the instructions on the screen.
If the device cannot be found, it may be recognized as an unknown device. If so, click "Open details."
In Windows Vista/7/8/8.1/10/Server 2008/Server 2008 R2/Server 2012/Server 2012 R2, if the device cannot be found, perform the following procedure.
(1) Display [Control Panel] > [Device Manager].
(2) Select [Other devices] > [Unknown Device] → click the [Action] menu > [Update Driver Software] or [Update Driver].
The driver software update wizard is displayed.
(3) Click [Browse my computer for driver software] → proceed to step 9.
6.
Click [Finish].
The procedure for adding the port is finished. Install the driver.
In the [Add a printer] screen, click [Have Disk].
8.
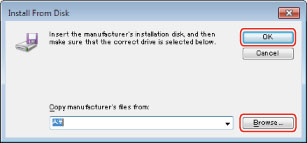
Click [Browse] → select the folder where the prepared inf file is stored → click [OK].
In the [Add a printer] screen, select the device from [Printers] → click [Next].
10.
Install the driver according to the instructions on the screen → click [Exit].
The installed device is displayed in [Devices and Printers], [Printers and Faxes], or [Printers] in the Windows Control Panel.
In Windows 10, the installed device is displayed in [Settings] > [Devices] > [Printers & scanners] > [Printers].
Related Topics